Determining The Layout For Your Floor Tiles For Bathroom

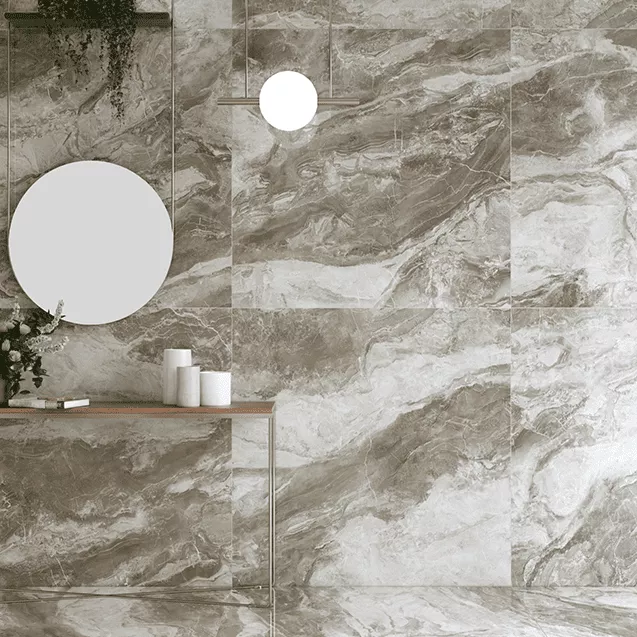
Image Sources: Danny Deco UK
Installing floor tiles for bathroom can be quite a daunting task if you don’t know what you’re doing. But, with the right guidance and tools, anyone can become a pro at it!
When it comes to floor tiles, there are various materials, colours, sizes and shapes to choose from. To ensure that your bathroom looks perfect after installation, there are certain steps and tips you should follow.
In this blog post, we will discuss how to install floor tiles for the bathroom the right way. Read on for some useful tips and tricks to get the job done properly!
What Is A Bathroom Floor Tile?
A bathroom floor tile is any flat or uneven surface in the bathroom. It is not the same as a stone floor, however, as they are made from a different mineralogy.
You can choose between stone, wood or plastic floor tiles, depending on how much room you are willing to devote to your bathroom. The two most common materials used in bathroom flooring are ceramic and floor tile.
Ceramic floor tiles are found mainly in hotels, residences and other commercial properties. They are typically cheaper than the brands you might find in a house, but you must be careful because they are very delicate.
Floor Tiles are a type of wall or floor tile which is located above the ground. While the stone and wood floor tiles are mainly located above the ground, the plastic ones are also found on the second story. They are decorative and can be installed as an addition to the bathroom.
Preparing The Surface
Tiling wall tiles for bathroom is a big job, but it’s one that you can do yourself with some planning and the right tools. The first step is to get the area ready. This means making sure the subfloor is level and clean, and installing a vapour barrier if needed.
If you’re starting with a bare subfloor, you’ll need to install plywood or an equivalent before tiling. The plywood should be at least 1/2″ thick and fastened to the joists with 2″ screws spaced around every 8″.
Once the plywood is in place, check for any high spots that need to be sanded down. Then sweep and vacuum the floor to remove any dust or debris.
If you’re working over an existing floor, you’ll still need to make sure it’s clean and level. Start by sweeping and vacuuming, and then use a self-levelling compound to fill in any low spots. Make sure you follow the manufacturer’s instructions to the letter.
Installing mosaic bathroom tiles is always a good idea when tiling a bathroom floor. This will help prevent moisture from seeping into your subfloor and damaging it over time.
Choose 6 mil polyethylene sheeting and tape all seams with waterproof tape. Lay the sheeting over your subfloor and cut it to size with a utility knife.
Why Do We Need Floor Tiles In Our Bathrooms?
First and foremost, if you are going to your bathroom for the first time, you’ll probably find it difficult to get use to the idea of having an entire wall space above you. This can be a problem because, as the years pass by, your bathroom floor will absorb the leeway that the walls provide.
A good solution to this problem is to install a floor tile. They are often replaceable and do not require any special equipment. They are easy to clean, smooth, strong and allow you to increase the space between you and the wall.
Second, you may come across a situation where you need to urinate in the middle of the night. Since you are only going to urinate standing up, you need something to steady yourself while doing so. Many people have a new bathroom wall or an alternative that is not so obvious. A floor tile is the perfect solution!
Laying The Tile
When it comes to the best tiles for bathroom wall renovations, one of the most popular choices is to install floor tiles. Tiles are not only stylish but also durable and easy to clean.
However, before you start tiling your bathroom, there are a few things you need to know to ensure the job is done right.
Here Are Some Tips For Laying The Tile In Your Bathroom:
- Choose the right type of tile. There are many different types of wall tiles for the bathroom on the market, so it’s important to choose one that is suitable for a bathroom environment. Avoid using porous tiles as they can absorb water and become stained. Instead, opt for non-porous tiles such as ceramic or porcelain.
- Prepare the surface. Make sure the surface you’re going to tile is clean and level. If there are any bumps or unevenness, use a self-levelling compound to create a smooth surface.
- Lay out the tiles. Before you start applying adhesive or grout, lay out the tiles in your desired pattern to get an idea of how they will look once installed. This will also help you determine how much material you’ll need.
- Apply adhesive and grout. Once you’re happy with the layout, it’s time to start adhering the tiles to the surface using an adhesive specifically designed for floors (not walls). Spread a thin layer of adhesive over an area large enough for a few tiles and then place them into position
Different Types Of Floor Tile
There are numerous varieties of floor tiles to choose from. They can be round, square, rectangular, or polished. The reason we list the round, square, rectangular and polished kind is because if you happen to buy a round or square floor tile, it will probably be the only one you will ever use.
The round and square tiles are the most common and are often use for individual rooms. The polish ones are paint to match and can be use in rooms that have a more formal feel.
How To Find The Right Match For Your Bathroom Floor
If you are just starting out as an architect, you may come across a problem with designing for different spaces in your home. For example, you might decide to paint the entire room white, which would require a redoing of the entire room.
This is a no-no in architecture. You would need to mix and match colours or materials to create a unique and interesting space. So, how do you find the right match for your bathroom floor?
Before selecting a choice, there are a few consideration. Let’s say you live in a castle-like house. The walls are all white with a black roof. If you decide to build your bathroom on the second floor, you would need to add a white wall. If you decide to go with a bathtub, you would need a white floor as well.
Sealing The Tile
Once you have your tile and your adhesive, it’s time to start sealing the tile. This process is important because it ensures that your bathroom designers London will be properly protected from water damage.
To seal the tile, you’ll need to apply a layer of waterproof sealant to the back of each tile.This sealant is available at most hardware stores. Once you have the sealant, simply follow the instructions on the packaging to apply it to the back of each tile.
If you’re using self-adhesive tiles, you’ll also need to apply a layer of sealant to the front of each tile. This will help keep the adhesive in place and prevent it from coming loose over time.
Once you’ve applied the sealant to all of your tiles, let them dry for 24 hours before continuing with the installation process.
Conclusion
Installing and shopping from luxury bathroom showrooms London for your bathroom can be a daunting task.
It’s important to pay attention to every detail when installing floor tiles in order to make sure that they last for years to come.
We hope this article has helped provide some helpful tips on how to properly install floor tiles in your bathroom, so that you can enjoy beautiful and durable floors for many years!