How to draw arms crossed
How to draw arms crossed While drawing human arms, certain features can make it challenging to draw precisely. Even though we know about arms, the direct parts of muscles and bone construction when the arms are in sure positions can make them challenging to draw.
Thus, figuring out how to draw with your arms crossed can become disappointing if you are visually impaired. The most proficient method to draw arms crossed will show you how simple it very well may be the point at which you know what to do. If you are looking for drawing ideas, cool drawings, cute drawings, drawing for kids, cartoon drawings, girl drawing, 3d drawing and many more, then you are at the right place, here you will get all of these drawings. how to draw hand
Stage 1:
While doing a drawing challenge like this, it’s vital to utilize your muscles well, so we’ll zero in on that in this step of our aid on the most proficient method to draw arms crossed.
Utilizing the reference picture we gave to assist you with canning, cautiously draw a progression of bent lines that interface and cross over. They may not seem to be arms yet, yet when we add them in the subsequent stages, you perceive how everything meets up to shape crossed arms!
Stage 2:
We will attract the lower arm of your crossed arms in this subsequent step. It will be beneficial to follow the reference picture as you draw. In the past step, you defined the external boundaries of the arm, and we will begin going inwards for this step.
You can expand a line from the lower part of the one you attracted the past step,
and this line will frame an intense point to shape the elbow of the left arm. Then, at that point, you can keep adding more lengthy bent lines to this elbow or more to shape the left lower arm. Assuming that sounds convoluted, the reference picture will assist you with handling business!
Stage 3:
You’ve splendidly drawn an arm to draw the right one! In this step of our aide on the most proficient method to draw arms crossed, you will rehash what you did in sync 2, except reflected. The hand on the left arm will go behind the right arm. The hand on this arm will then, at that point, pass under the one on the left.
Once more, this might sound convoluted, yet it’s easier than it looks when you follow the means! Before continuing toward the subsequent stage, you can add a couple of lines close to the highest point of the focal point of the crossed arms for the collarbones.
Stage 4:
Having a couple of headless arms above them would look somewhat upsetting, so try not to add a head in that frame of mind of your crossed-arms drawing! You can initially define two vertical boundaries for the neck because the head will be us. Then you can draw the head with a genuinely dainty oval shape.
Then, at that point, you can draw ears on the sides of the head. We’ve kept the head plan pretty basic. However, you can continuously get it more included on the off chance you need it! The crossed arms are, as yet, the superstar; however, it never damages to add your very own portion subtleties.
Stage 5:
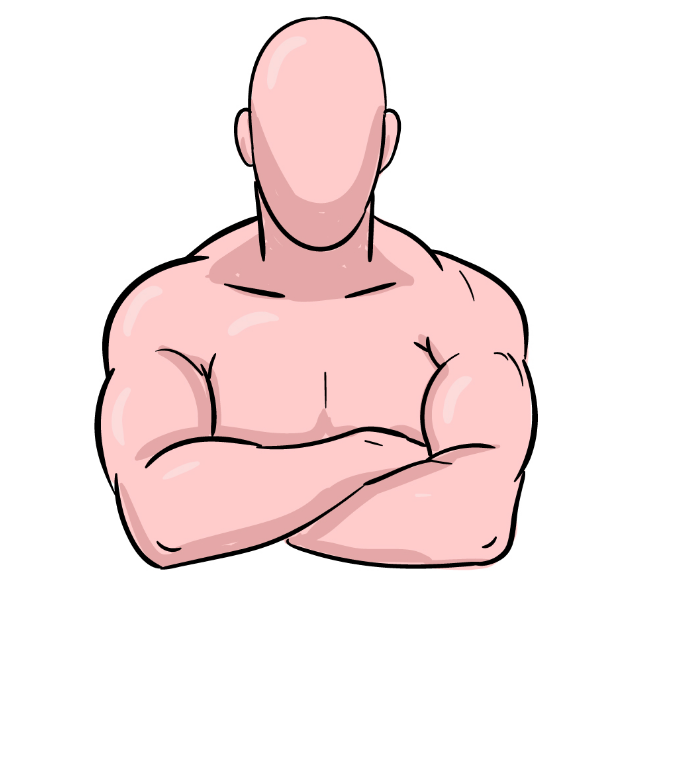
This fifth step of our aid on the most proficient method to draw arms crossed will permit you to add a couple of conclusive minor subtleties to finish the vibe of the muscles.
You’ll add heaps of little, bent lines right down the arms, as you can find in our reference picture. Whenever you’ve added those last subtleties, add the contacts and subtleties you need!
We referenced making a face more point by point in the past step, and presently you can take it significantly further by drawing a genuine face on it. You might draw your face on it! You could draw different perspectives, like a shirt on the body or an excellent foundation. How can you proceed to end this delineation before shadowing it?
Stage 6:
Now that you’ve completed your crossed-arms drawing, now is ideal to have a good time shading your fine art! This last step is where you can dominate and flaunt your inventiveness. You have numerous choices for shading this, and we’ve just shown one of the vast potential outcomes in our reference picture.
You can utilize your number one craftsmanship mediums to reproduce your complexion for this drawing for an additional individual touch! Or, on the other hand, you can go for an elaborate methodology and utilize your number one tone to make this plan stick out.
You can mess around with your number one artistry medium whenever you’ve settled on the varieties you need to utilize. For a more brilliant, expressive methodology, you can likewise utilize something like acrylic paints or hued pens for energetic variety.
also read: Why outsourcing your architectural work is a great idea!